*This setup guide applies to the Classic Woobox campaign templates found at the bottom of the “New Site” creation screen.
Create a Bracket poll
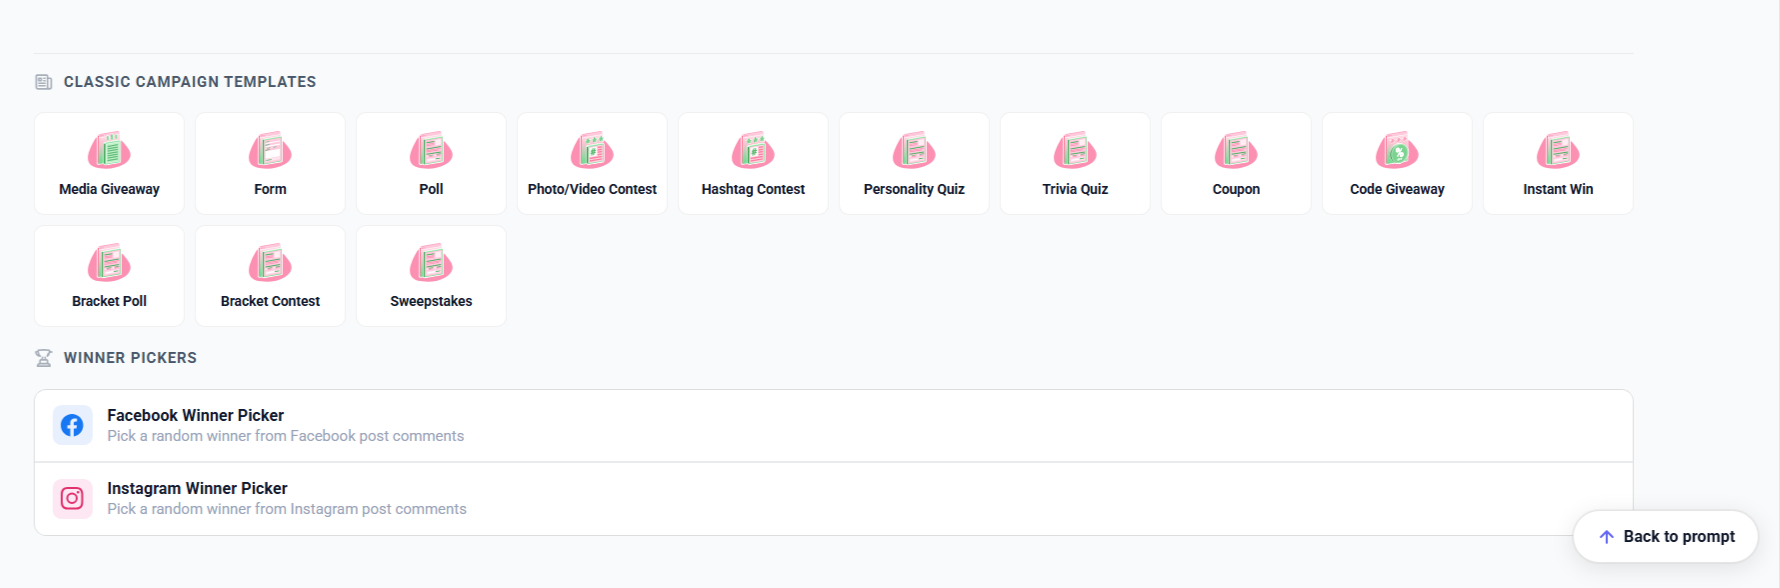
From the Sites screen, scroll to the bottom of the page, and select the campaign type from the Classic Campaign Templates category, then choose Bracket Poll (voting bracket). *For a Predictive bracket, choose Bracket Contest.

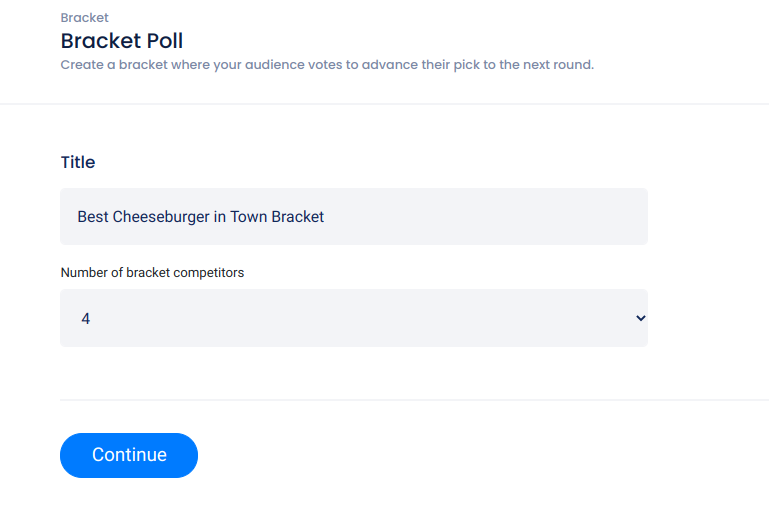
Give your Bracket Poll a title and choose the number of competitors (4, 8, 16, 32, or 64) then click Continue.
Design tab
The next section you’ll see is the Design tab. Here you can add backgrounds, images, videos, and customize the campaign’s Form Element. For more information on adding elements, styles, and themes check out this article.
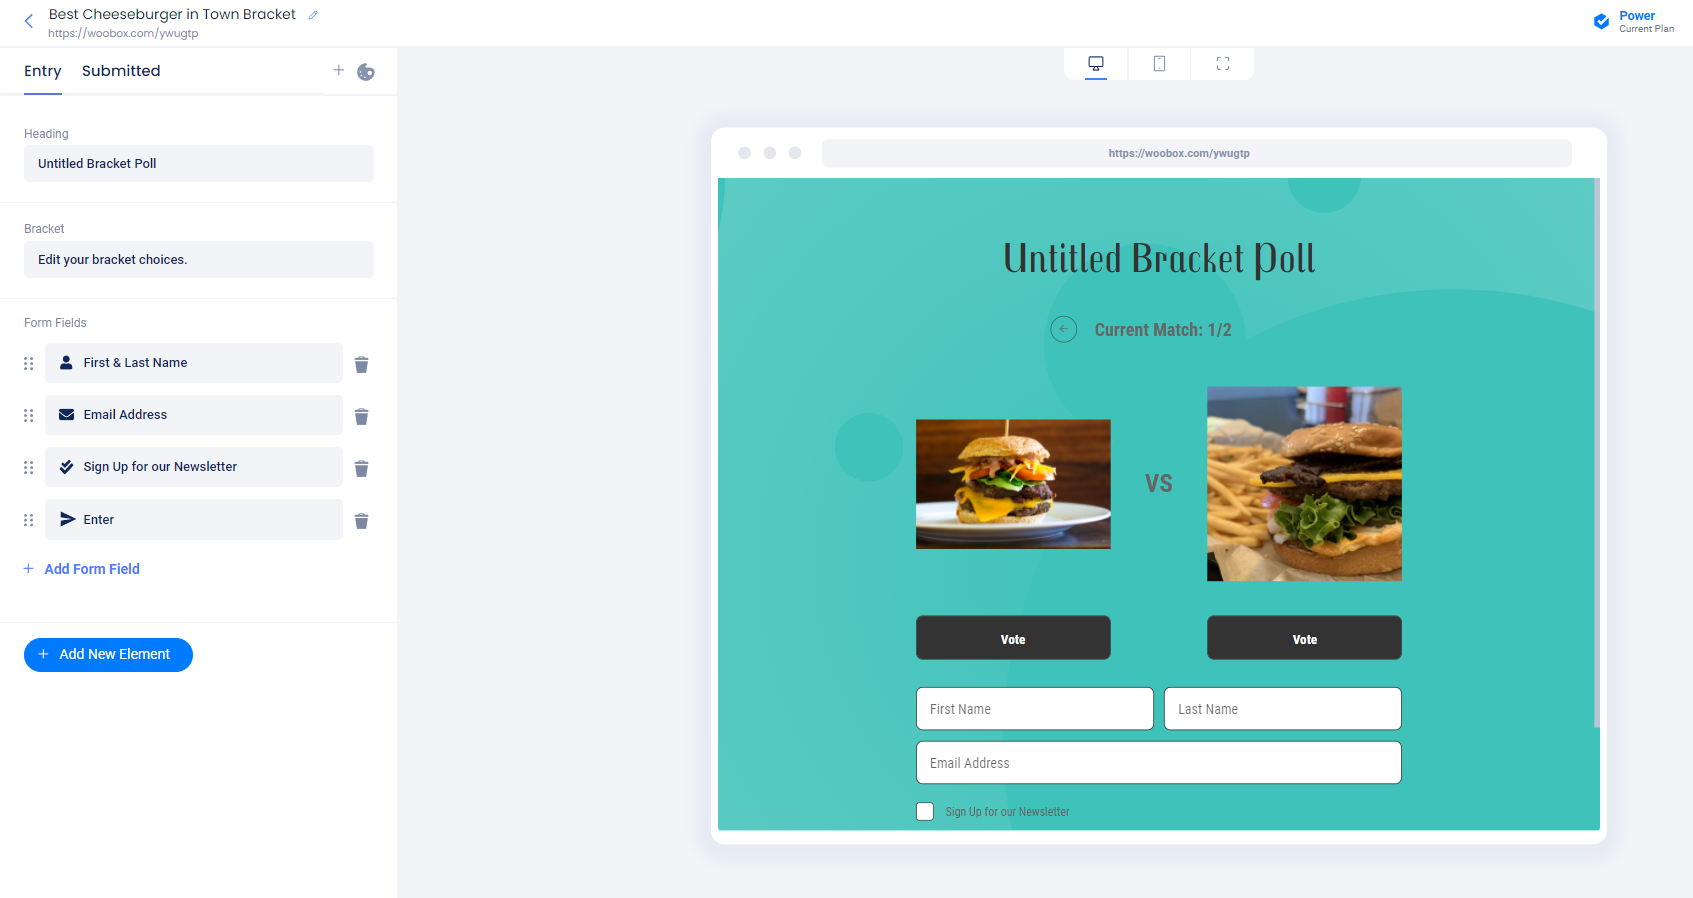
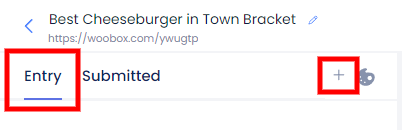
You can switch between the pages you are customizing from the left navigation menu. Click the + icon to add a customizable Pre-start or Ended page.
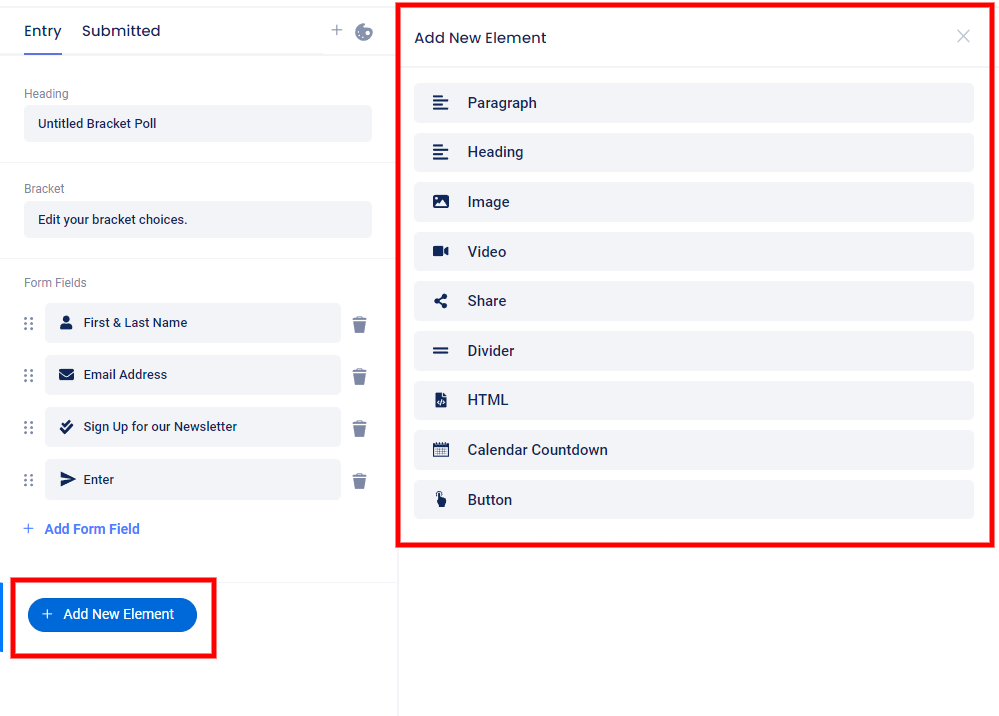
With the desired page selected, click Add New Element in the left navigation to add images, videos, text, and more.
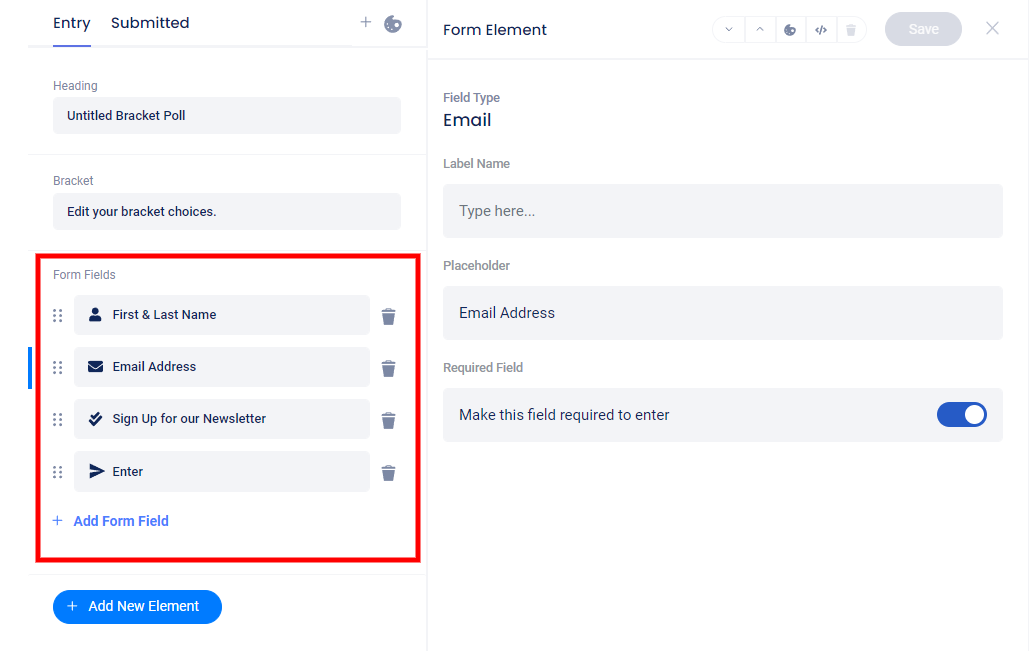
Customizing the Form Fields
While in the Design section, click on Form Fields in the left panel to add or edit form fields.
Click the “Painter’s Palette” icon to set a theme, background, and other styling options.
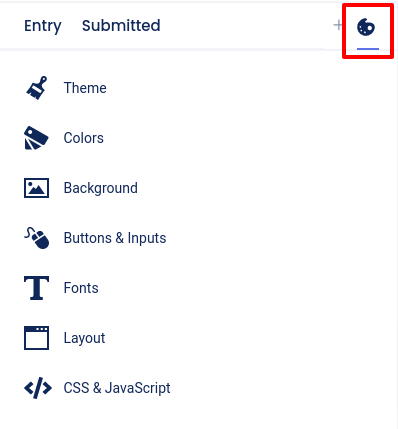
Theme menu selected:

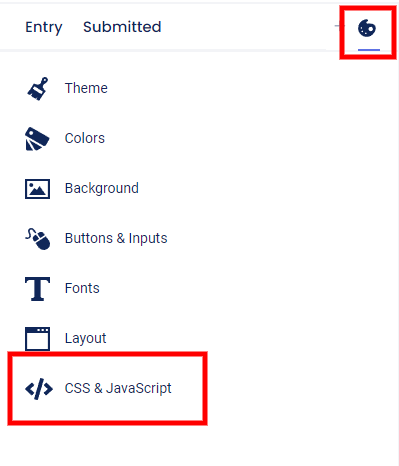
Custom Coding
By clicking the “Painter’s Palette” icon in the Design section, you can access the CSS section (on Advanced plans or higher) or the Javascript section (on the Power plan) to add custom coding.
Overview Tab
In the Overview section, you can edit basic settings and view or download stats. After the first round ends, you will also see bracket results on this page.
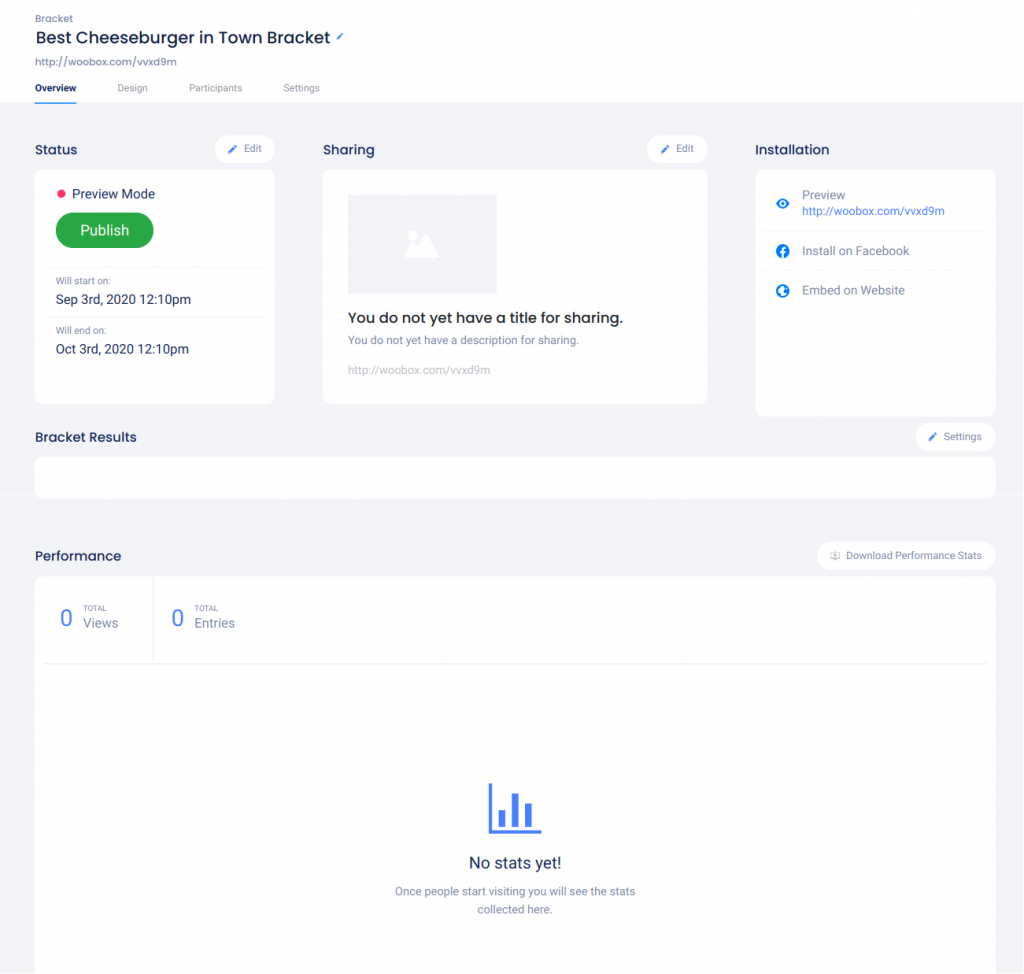
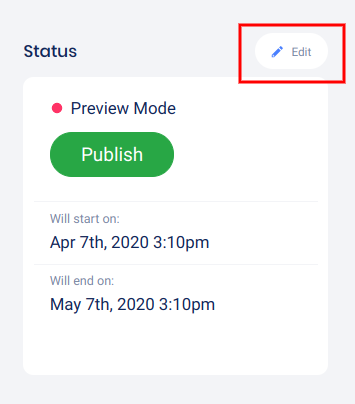
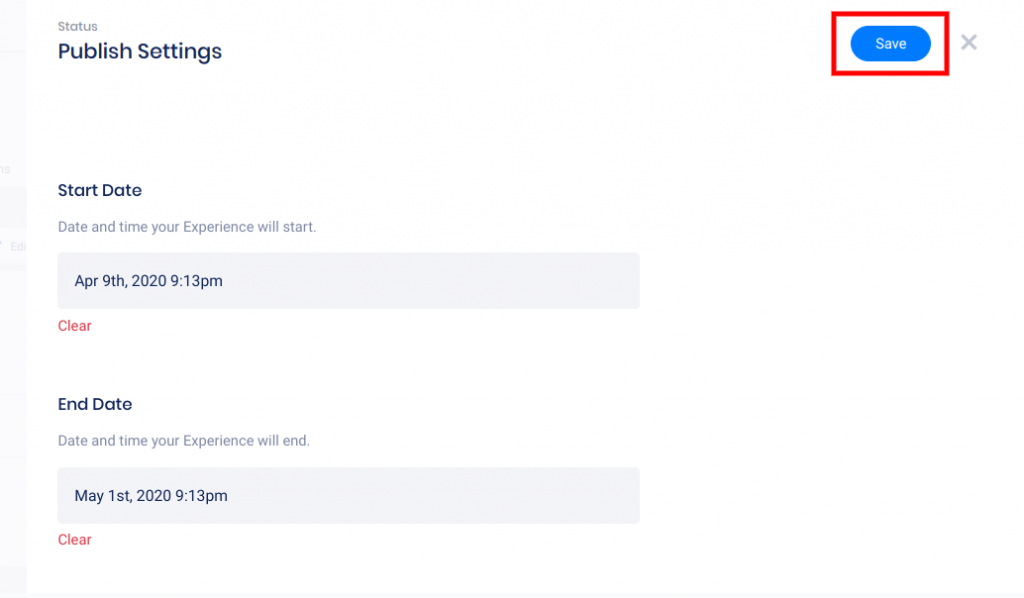
Click the Edit button above the Status section to set the start and end dates of the experience’s entry period. This is the overall date-range for the entire campaign. You will be setting up the dates for each round in the Settings section.
Select the dates and times, then click Save.
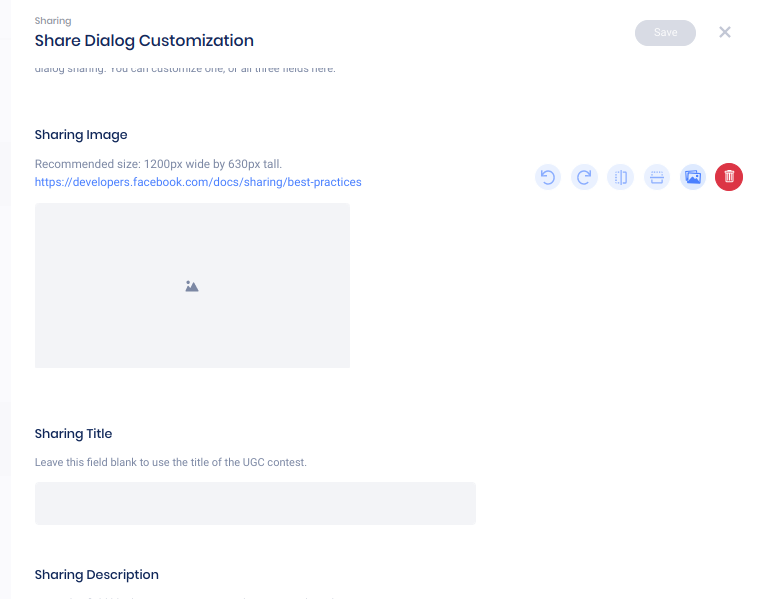
Click Edit above the Sharing section to customize the sharing image, title, and description for your experience URL.
To skip ahead and start adding bracket choices and round settings, click Settings to the right of Bracket Results.

Performance Stats
Once your experience receives views or entries, you can view a graph of these stats for the past past week, past month, or past year. Click Download Performance Stats to export a detailed traffic stat CSV file.

Participants tab
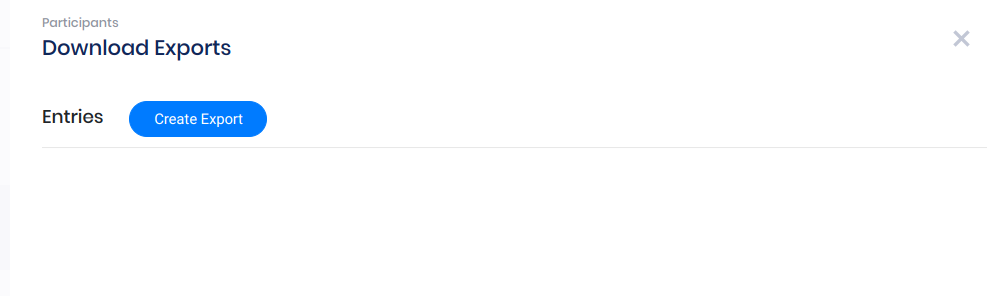
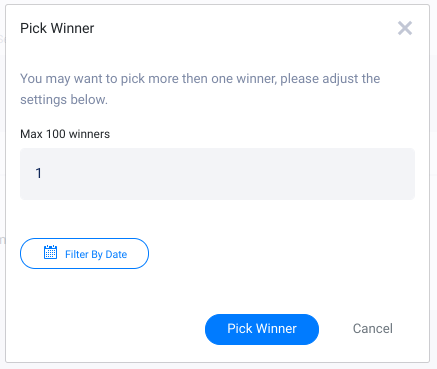
In the Participants tab, you can view entry data for the first 1,000 entries, pick winners, and download your Entries and Uploads exports.
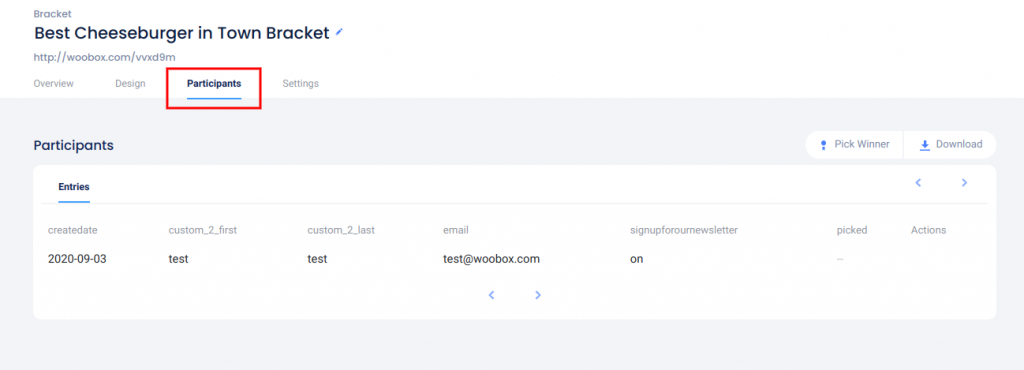
Click Download to open the Exports panel
Click Pick Winner to randomly select one or more winners
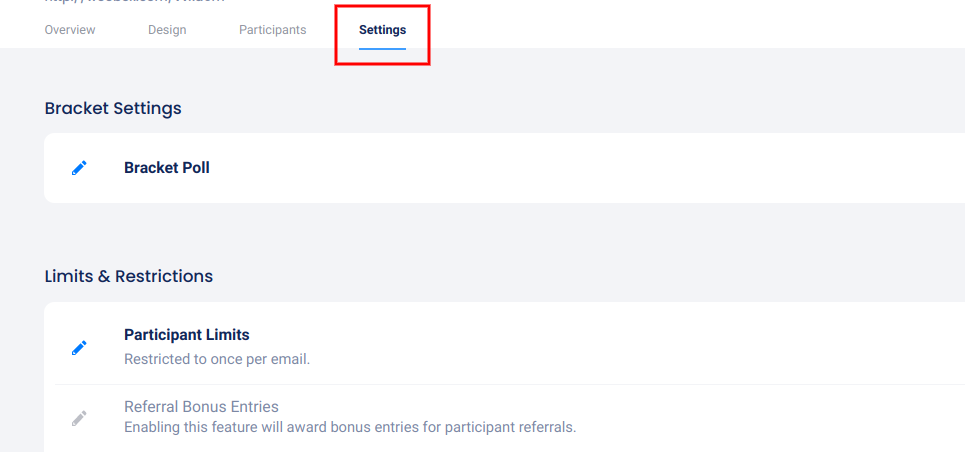
Settings tab
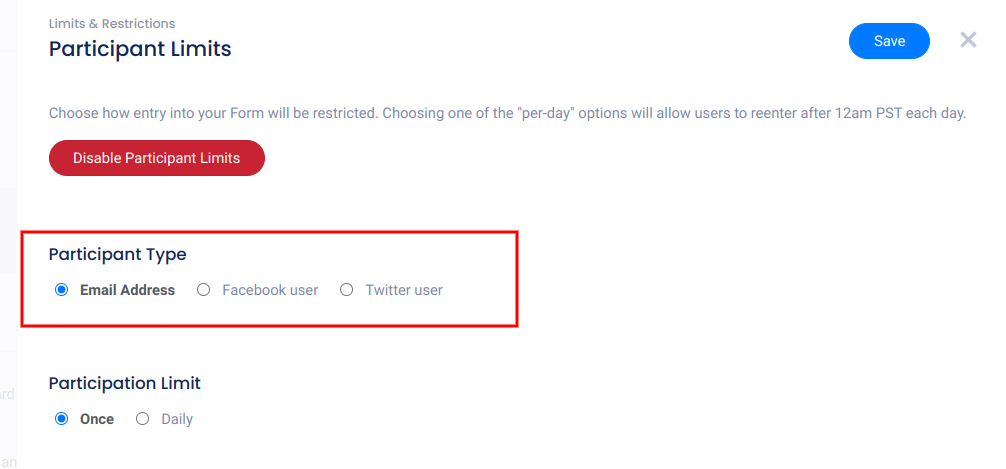
Under the Settings tab, setup the bracket competitors and rounds in the Bracket Poll section, and enable entry restrictions and limits, bonus entries for referrals, and age or password restrictions in the Limits & Restrictions section.
Entries can be restricted by Email Address, or Facebook user (once overall, or daily).

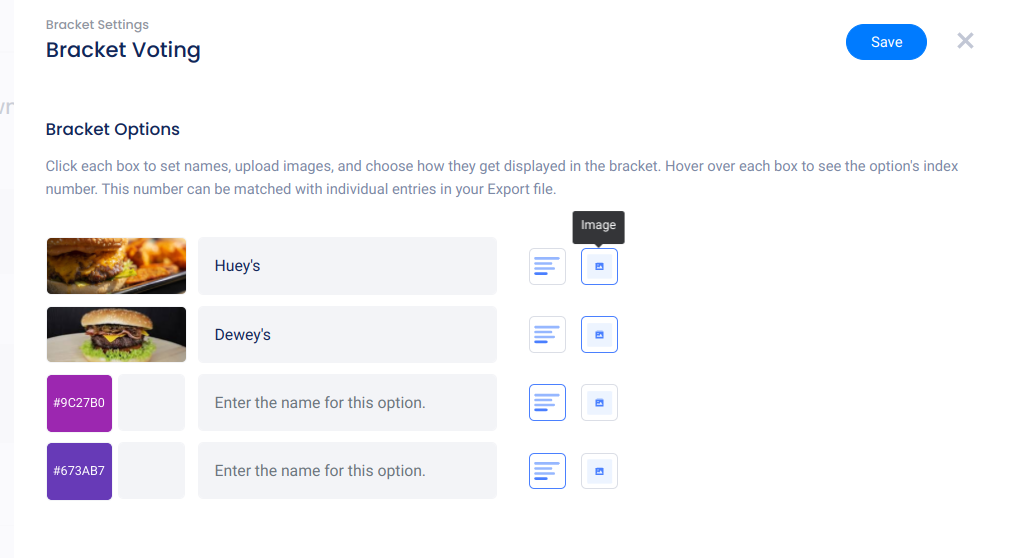
Click Bracket Poll to open the bracket settings panel and add the bracket choice titles and initials, and choose between “Color & initials” or “Image”. Upload competitor images to the left of the initial field.
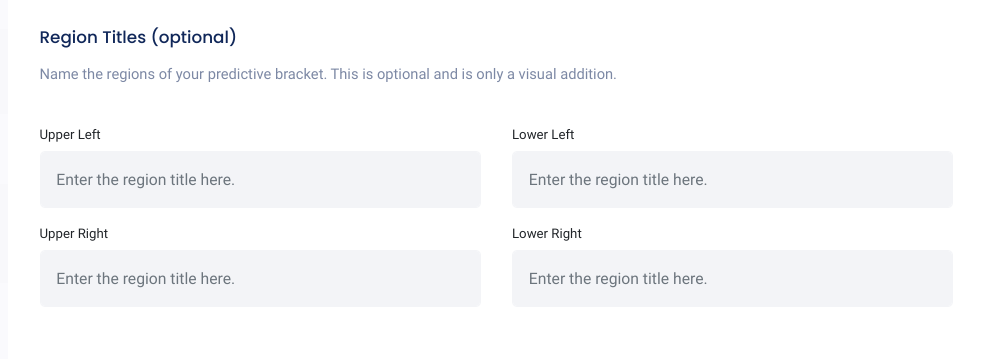
Scroll down on the panel and you can add optional region names.
At the bottom of the bracket settings panel, you can set the start and end dates/times for each round (when the round ends, the competitor with the most votes from each match-up advances).
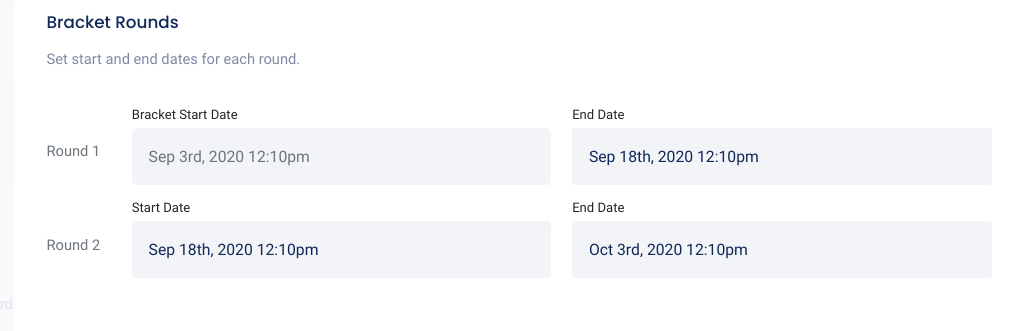
*the start date/time for round 1 will match the date and time you created the campaign. This date cannot be edited, but round 1 will begin at the start time and date set in Overview if the campaign is published.
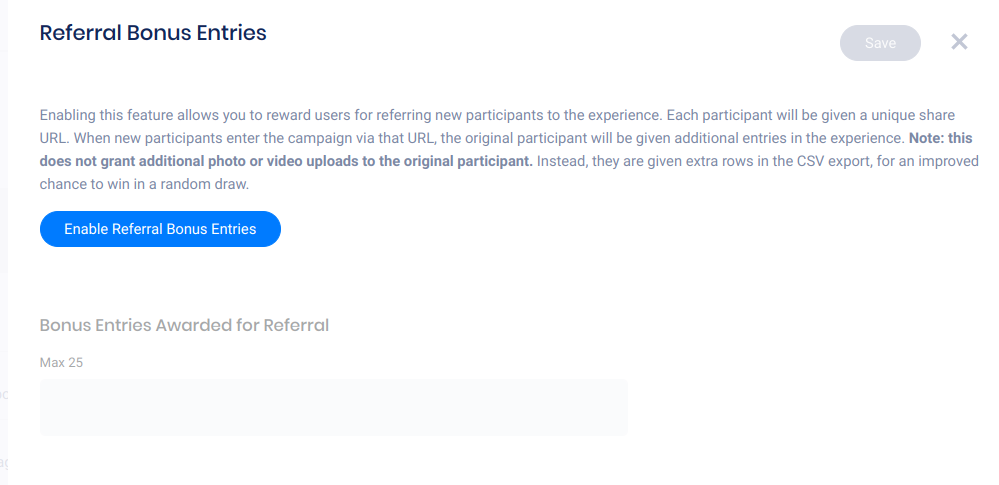
Click Participant Limits to restrict entry, and click Referral Bonus Entries to enable bonus entries for referral.

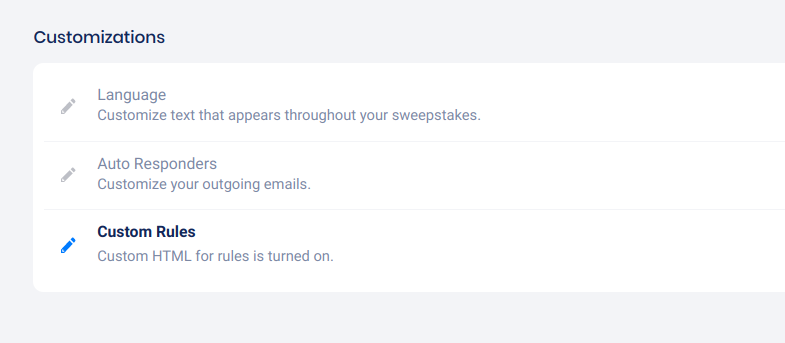
In the Customizations section, you can customize all of the default language and auto-emails for your experience, and add your custom rules text, HTML or link.
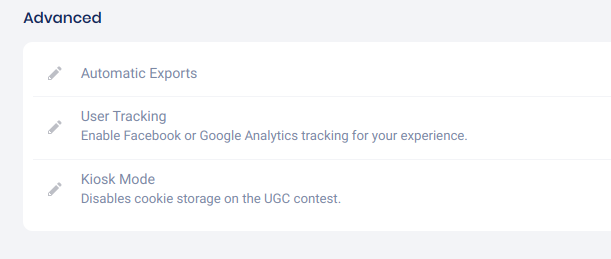
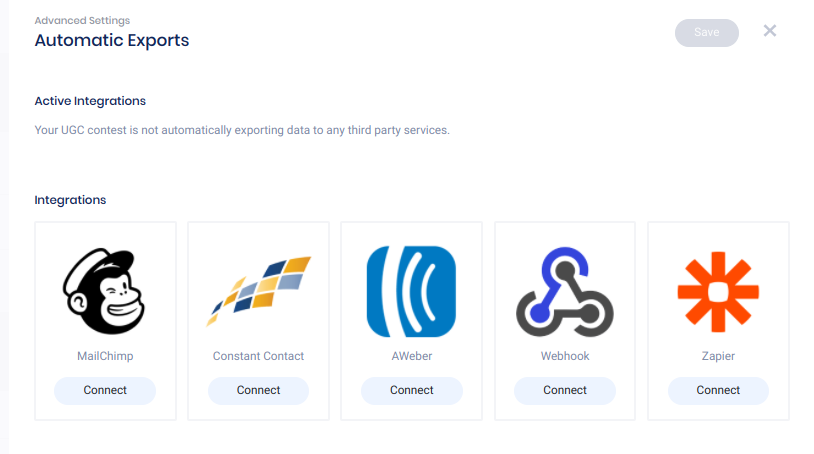
In the Advanced section, you can setup real-time integration for Automatic Exports, Facebook and Google Tracking, or enable Kiosk Mode for on-site campaigns.
At the bottom of the Settings page, you can Reset, Copy, or Delete your Bracket Poll.

Preview and Publish
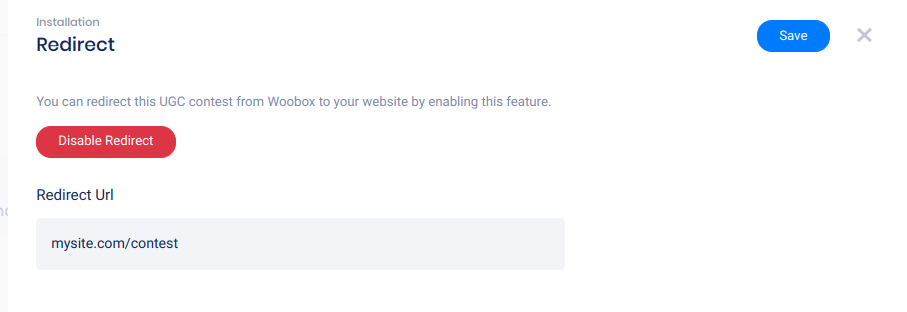
When you’re ready, go back to the Overview tab and test/preview your contest by clicking the experience URL under Installation.

Click Preview to redirect the URL to an embed on your website.
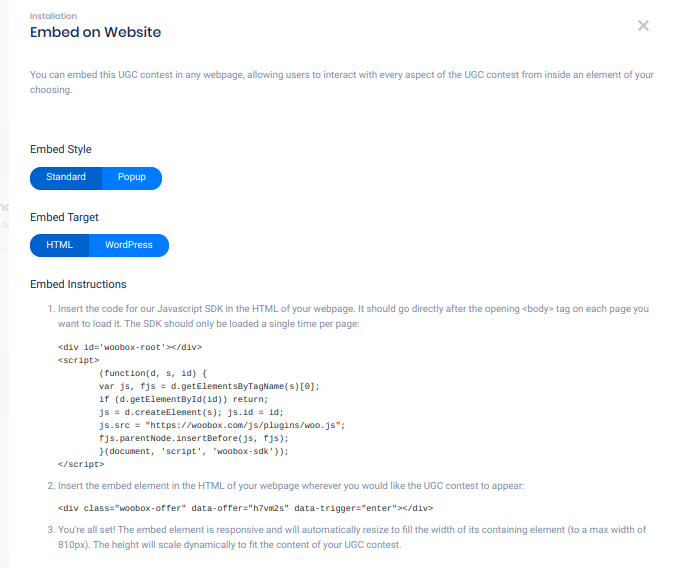
Clicking Embed on Website will open the Embed panel where you can copy the JavaScript embed code or WordPress short-code and adjust optional popup settings.
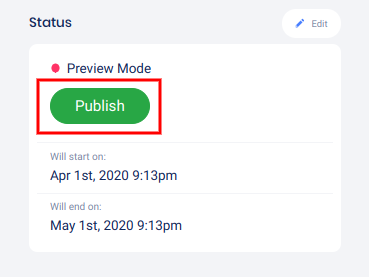
To turn off Admin-Only mode and publish your experience, click the Publish button in the Status area.
If you have any questions or issues setting up your campaign, don’t hesitate to email us at support@woobox.com!