Here is a step by step setup guide to help you create, edit, customize, and go live with your Poll in just a few short minutes.
Create a Poll
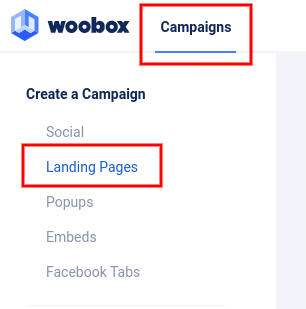
From the Campaigns screen, select the template type – Landing Pages.

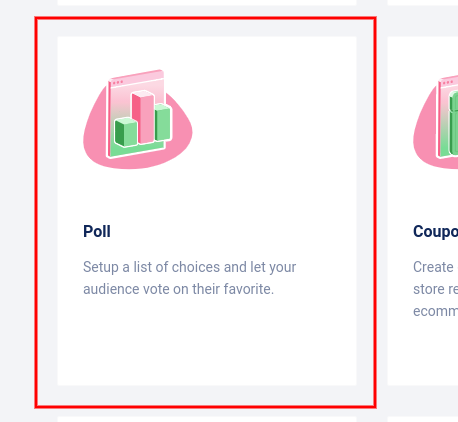
Then choose Poll.

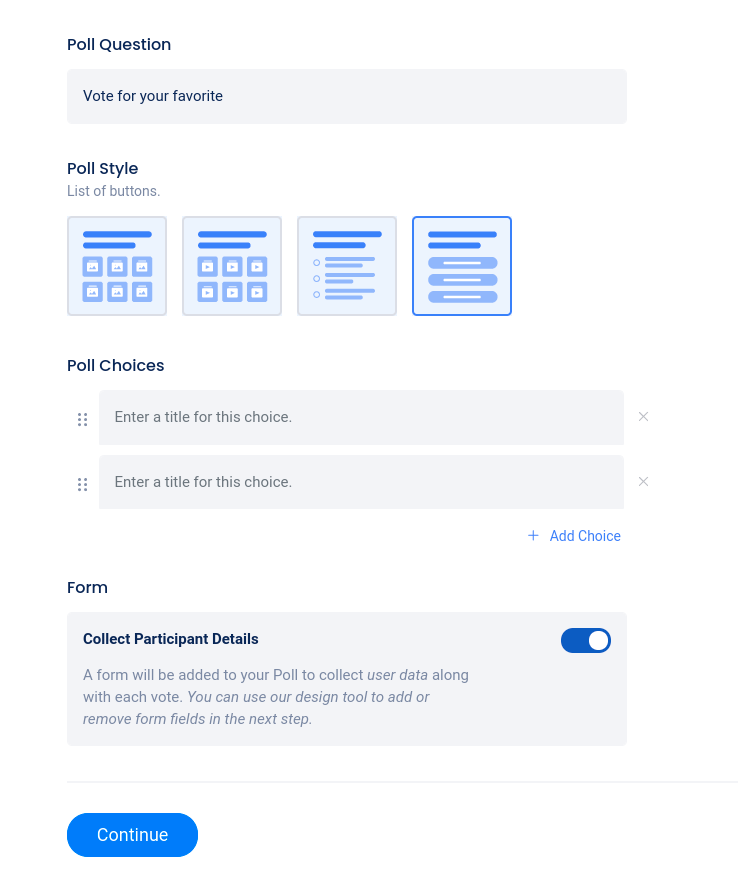
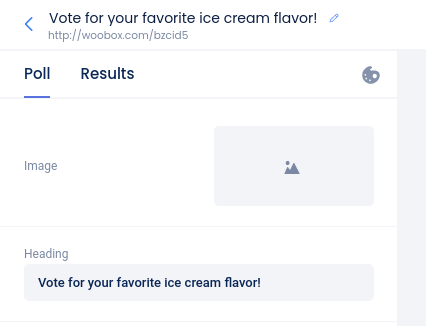
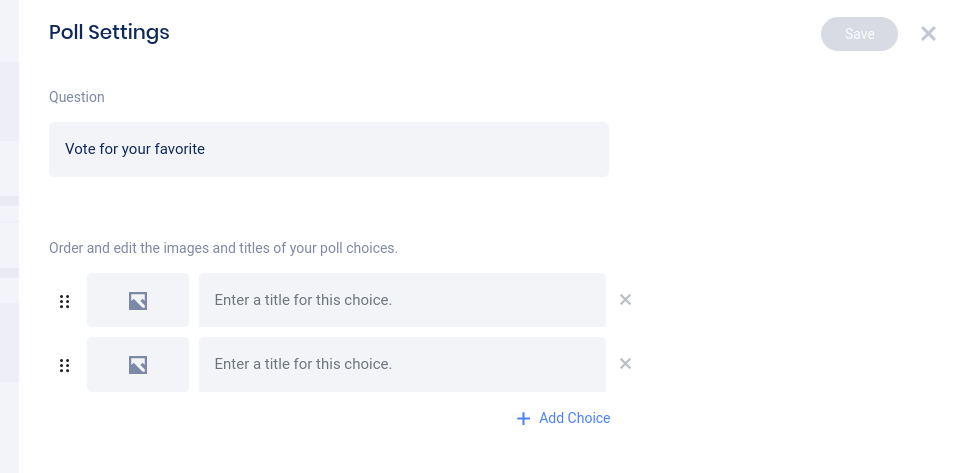
You will then able to edit the basic settings such as Title, Poll Style (radio buttons, images, videos, or buttons), then add poll choices (you can add more or edit later), and choose if you want a form to collect data from voters or no form/data collection at all.

Design Tab
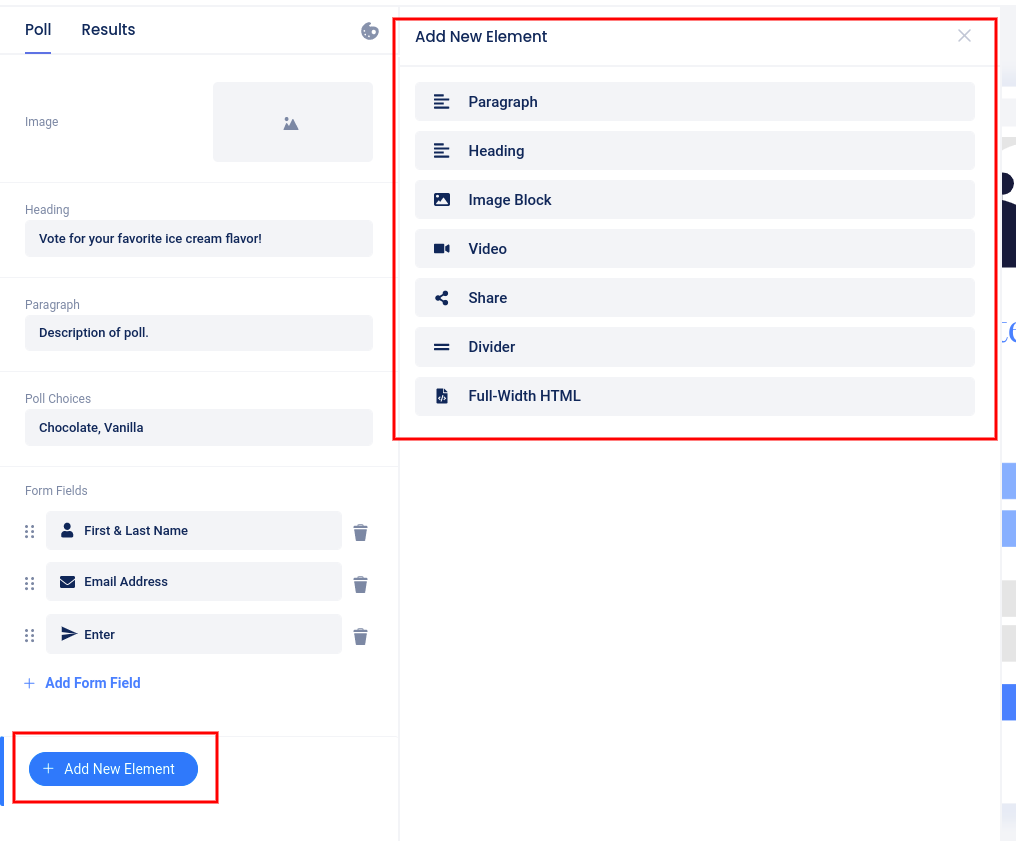
After clicking “Continue” you’ll be taken to the Design tab where you can add backgrounds, images, videos, and customize the campaign’s Form Element.

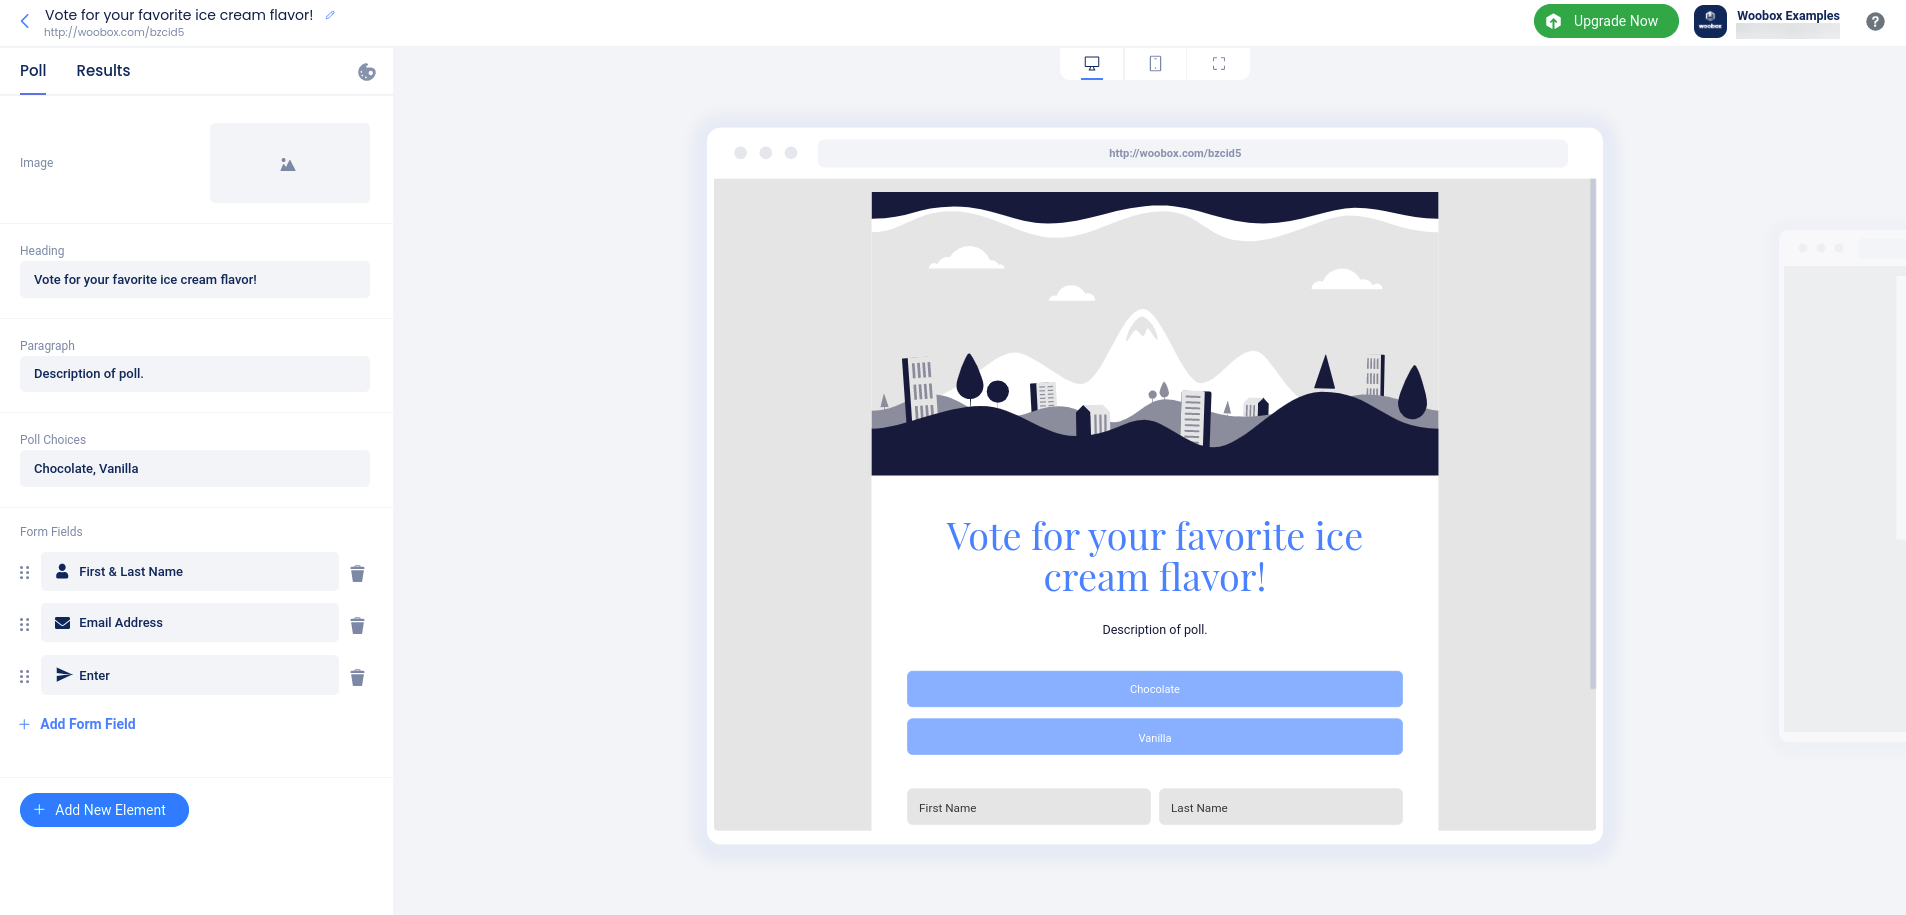
You can switch between the Poll (Entry) and Results (Post entry) pages by clicking on those options in the top left.

By clicking Add New Element in the left navigation, you can add images, videos, text, and more.

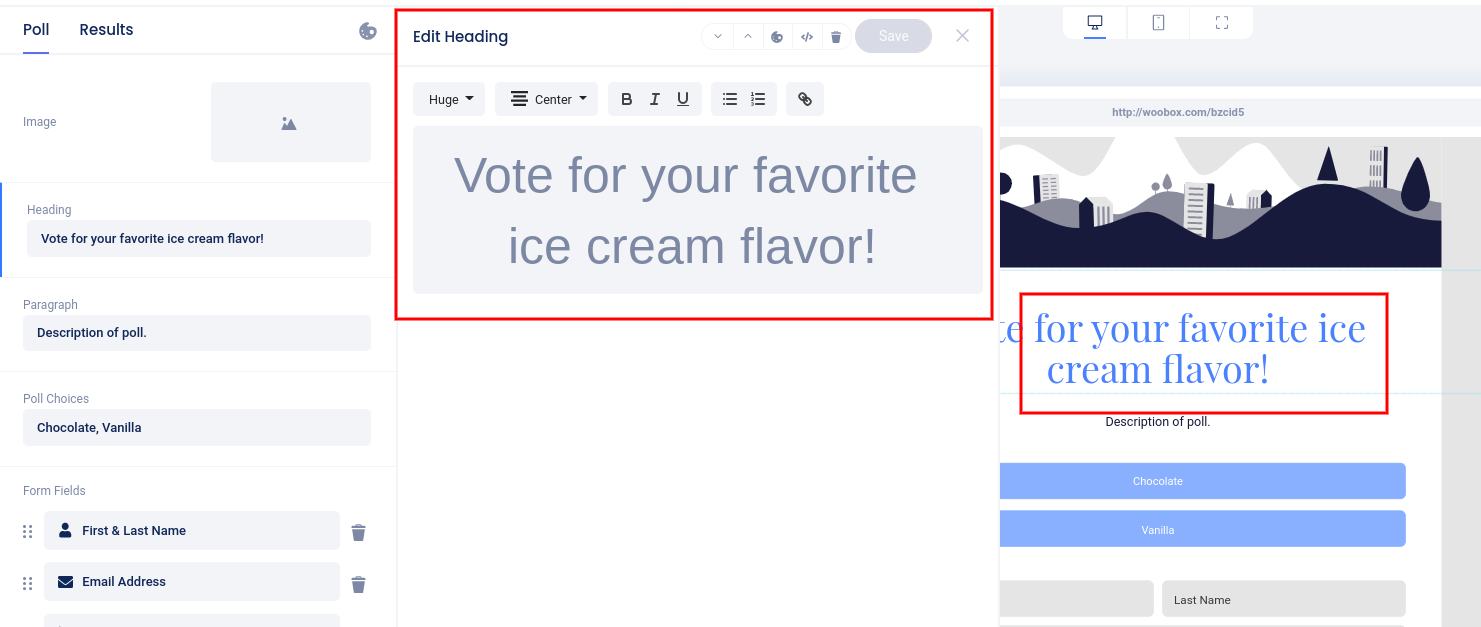
Clicking directly on an existing element allows you to edit that element.

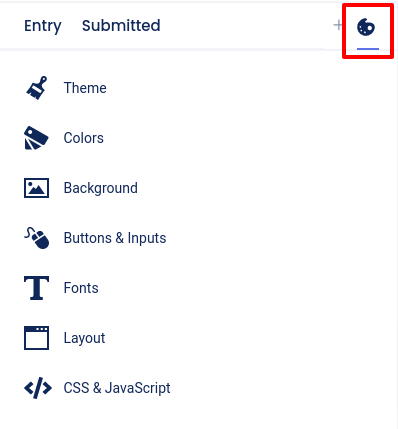
Click the “Painter’s Palette” icon to set a theme, background, and other styling options.

Theme menu selected:


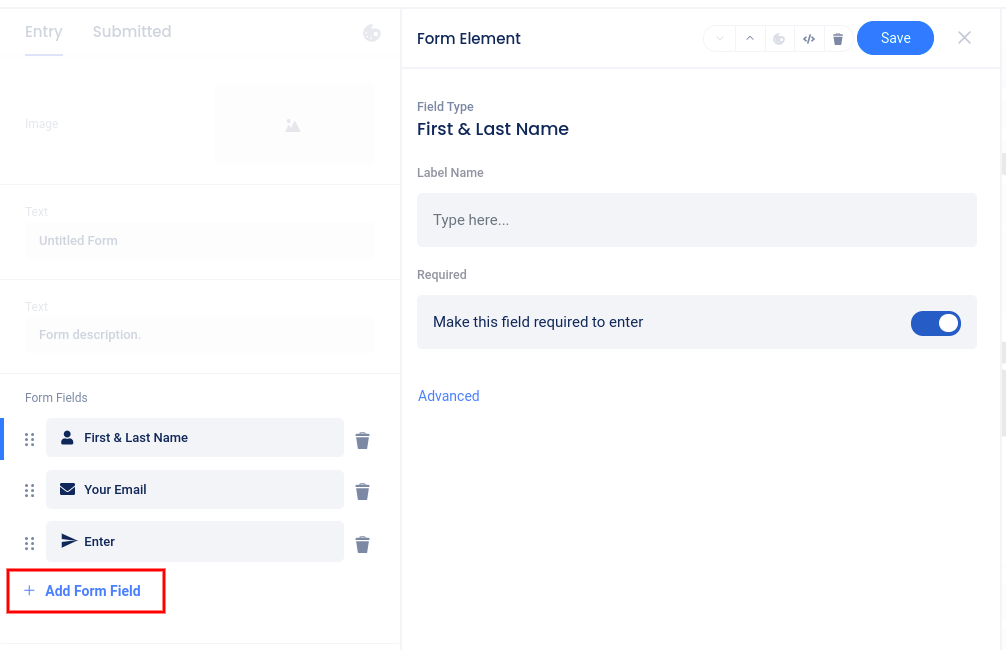
Customizing the Form Fields
While in the Design section, click on the Form element itself, or the Form Fields area in the left sidebar, then click Add Form Field to add fields. Click directly on an existing field to edit that specific field.

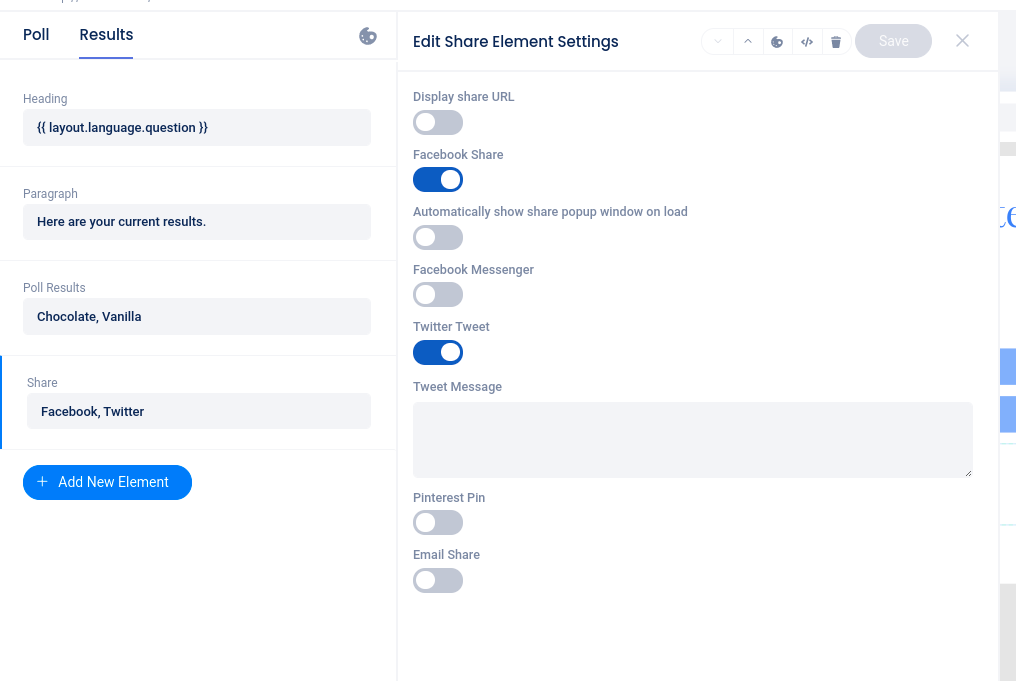
Once a user has successfully entered, they will be directed to the Results page. This page acts as confirmation that the user has successfully entered and displays the current poll standings. Be sure to customize your post-entry message and edit the share element to encourage sharing.

Poll Results Element
On the Results page, click on the Poll Results element to show or hide titles, choose the order results display in, and if the results are shown as “count” or ‘percent”.
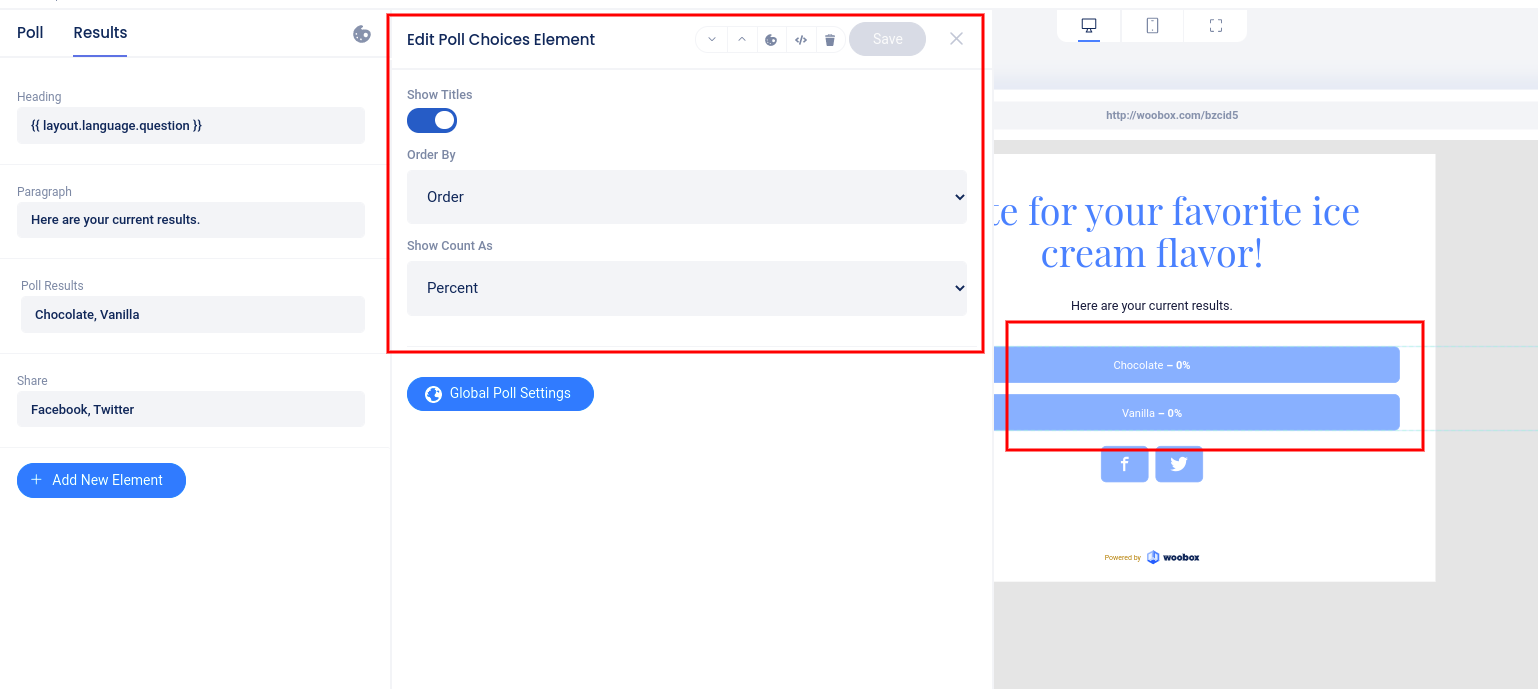

If you do not want to display poll results, you can delete the Poll Results element using the “trash can” icon in the panel on the left.
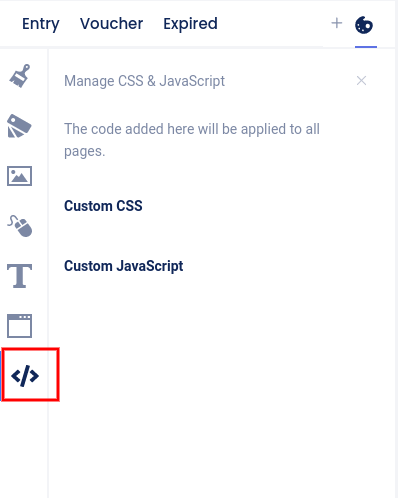
Custom Coding
In the Design section, at the bottom of the “Painter’s Palette” section, you can access the CSS section (on Advanced plans or higher) or the Javascript section (on the Power plan) to add custom coding.

Overview Tab
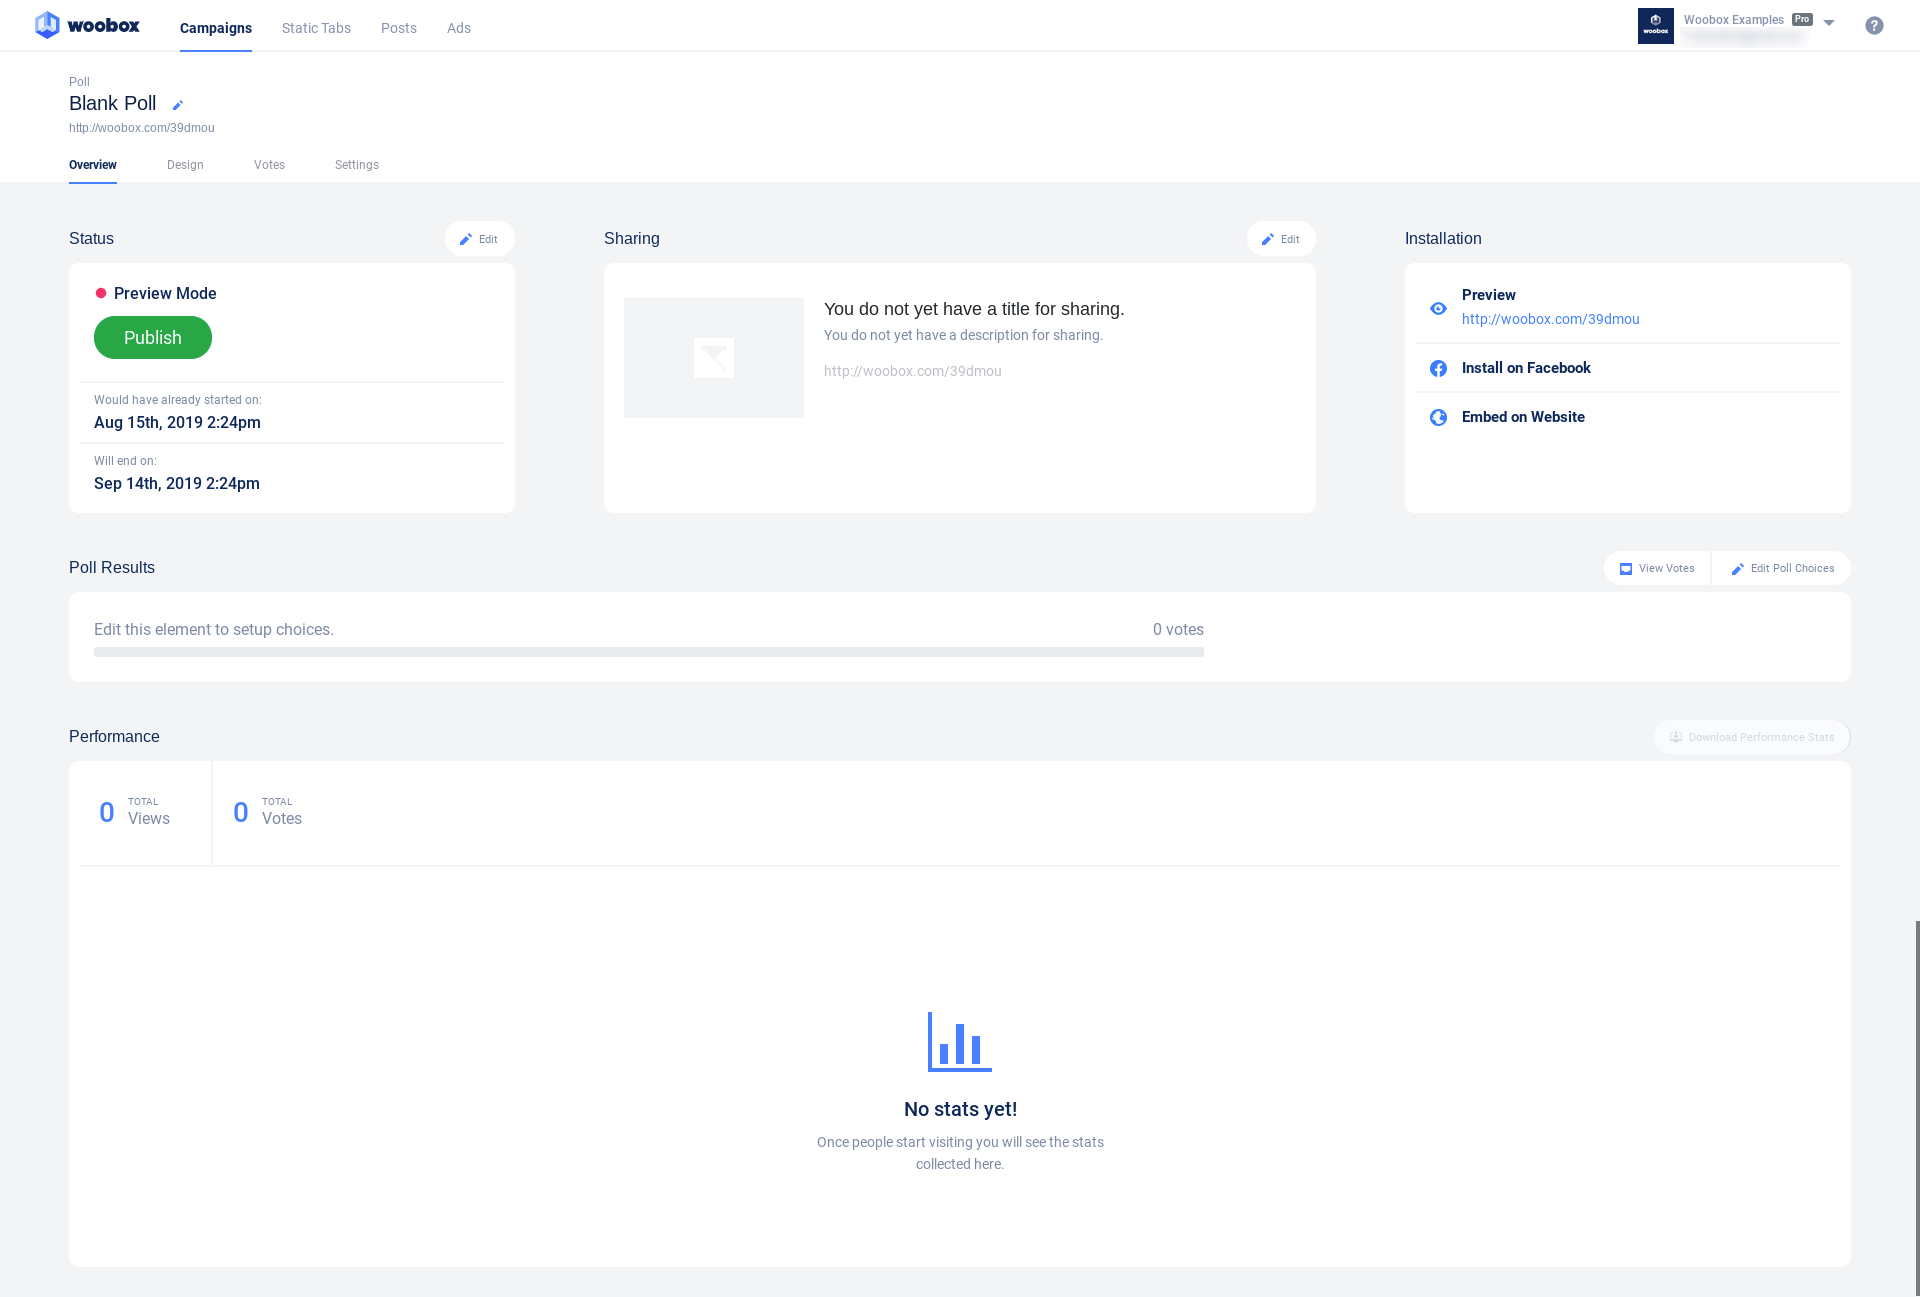

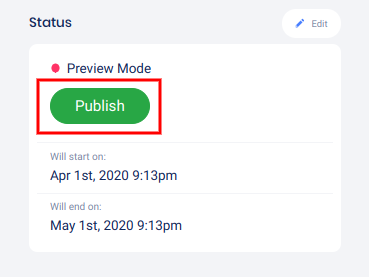
Start by clicking the Edit button above the “Status” area to adjust the experience’s start and end dates and times (times reflect your local time-zone).
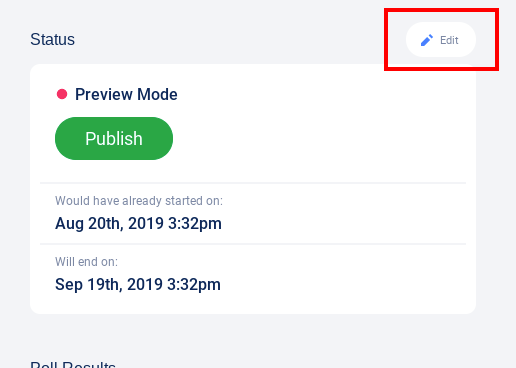

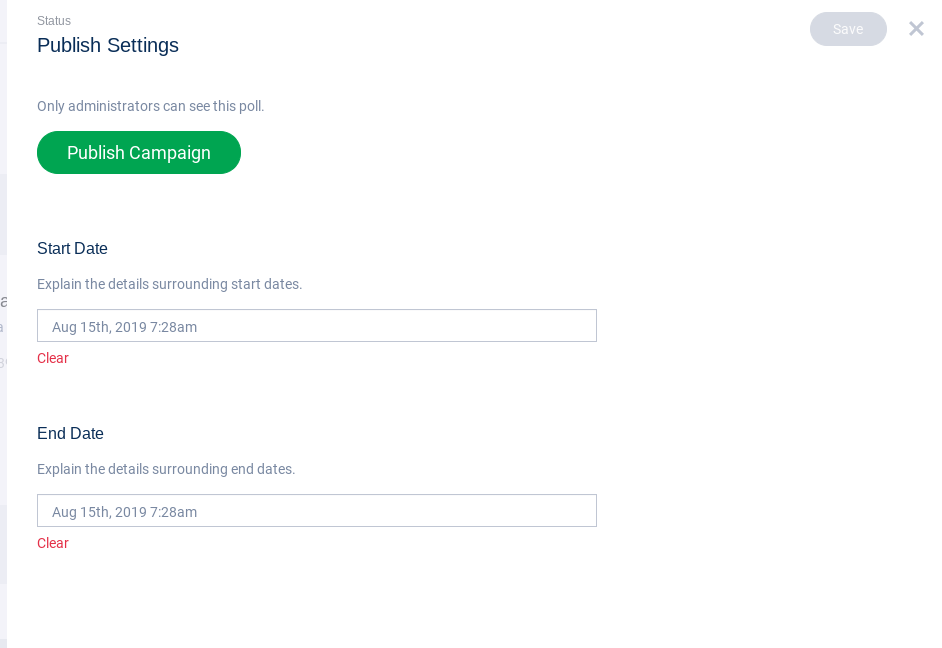

When you’re ready, you can also Publish the experience (turn off Admin-Only mode) here.
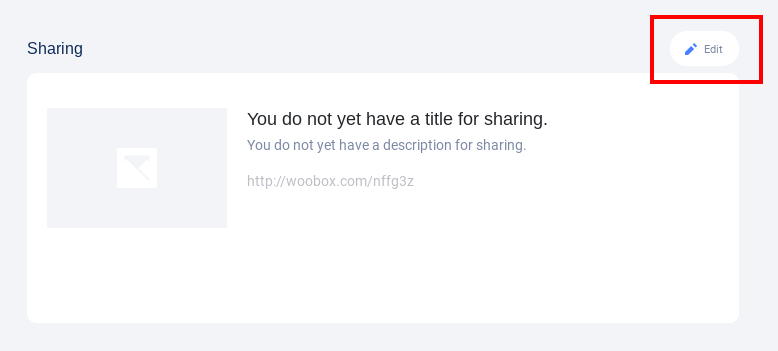
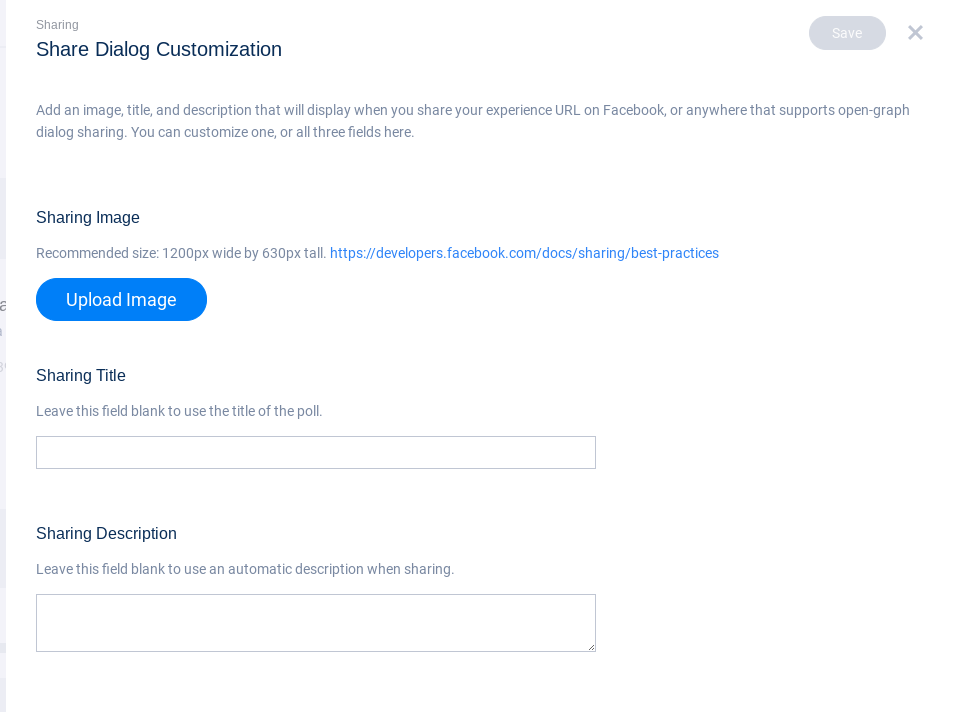
Share Dialogue
Also in the Overview section is Sharing. Click the edit button to customize the shared title, description, and/or image. *This will apply to Facebook, Twitter, and anywhere that recognizes open graph share dialog.


Once your Poll has received votes/entries, you can return to the Overview page to view the progress. You can also click the View Votes button to view the entries and collected data (you can also export from that page).


Click Edit Poll next to View Votes to edit or add new poll choices.


Once a user has successfully entered, they will be directed to the Post Entry page. The Post Entry Page acts as confirmation that the user has successfully entered.
Votes tab
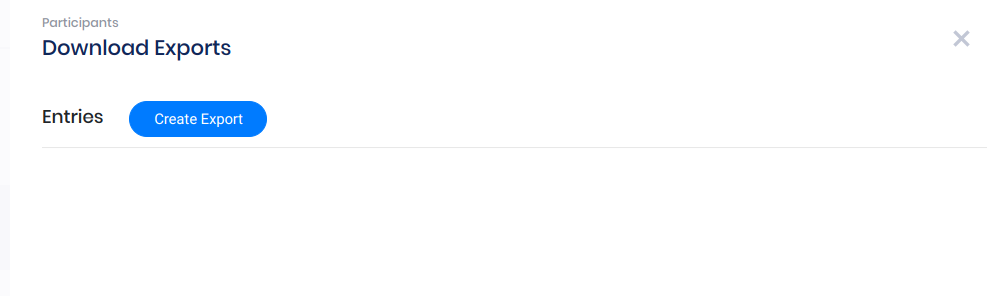
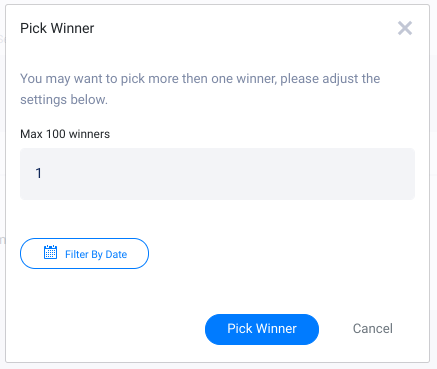
In the Votes tab, you can view entry data for the first 1,000 entries, pick winners, and download your Entries and Uploads exports.


Click Download to open the Exports panel

Click Pick Winner to randomly select one or more winners

Settings Tab
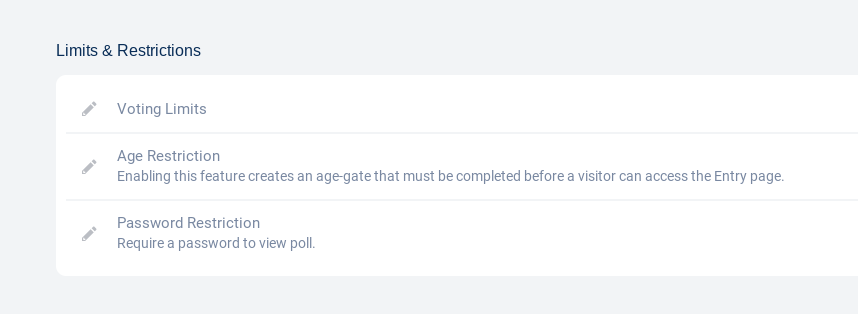
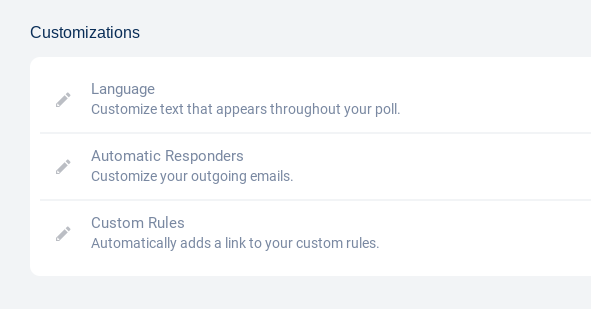
In the Settings tab, you can edit entry and age restrictions, password-protect the experience, customize the language, add rules, and more.


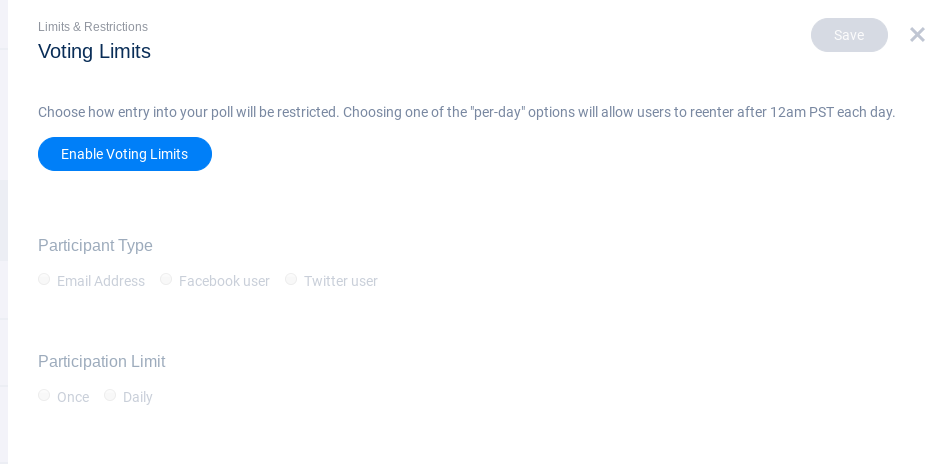
Click “Voting limits” in the Limits & Restrictions section to enable and choose entry restrictions (the number of times a user can enter).


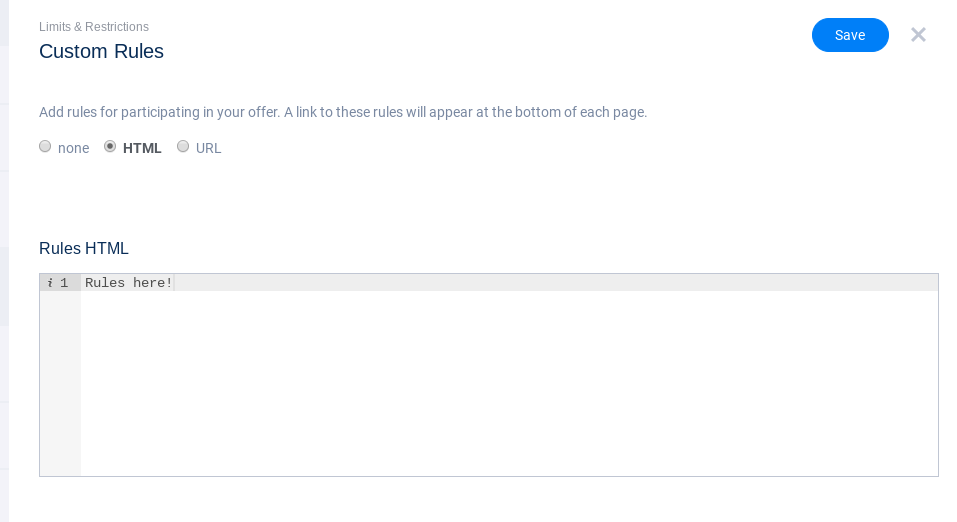
Clicking “Custom Rules” in the Customizations section will allow you to type/paste in your rules, or add a URL to the site where your rules are hosted.


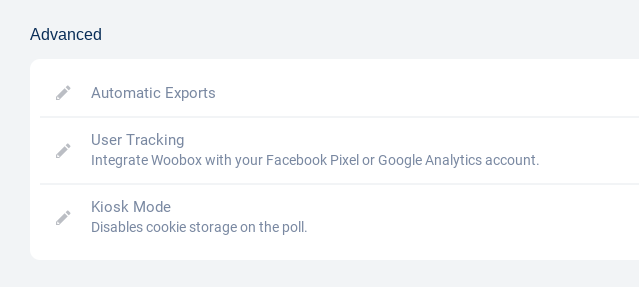
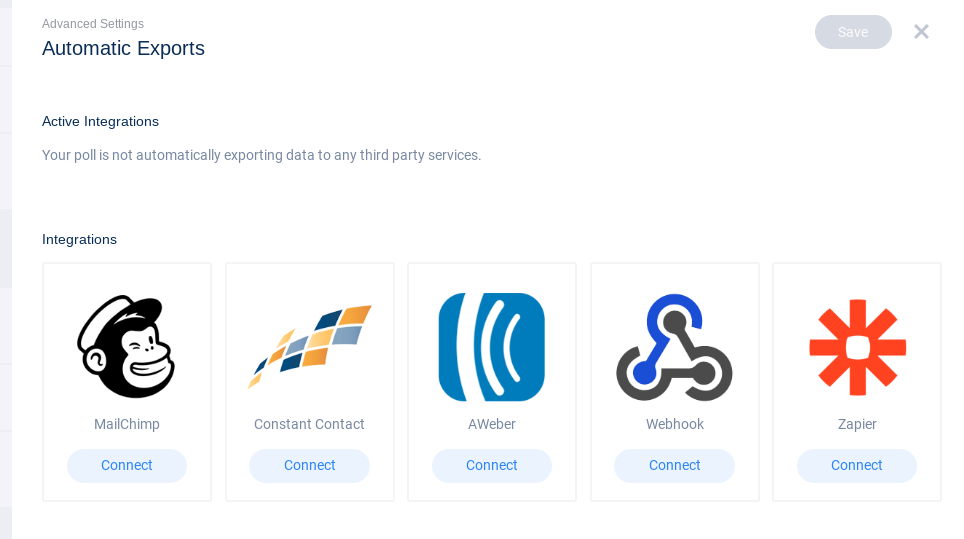
The Advanced section allows you to add your Google Analytics or Facebook tracking pixels, enable Kiosk-mode, and setup real-time data exports.


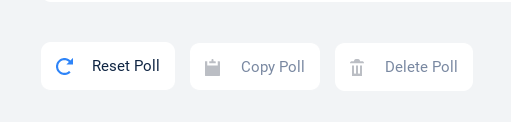
At the bottom of the Settings section, you can Reset, Copy, or Delete your Poll.

Preview and Publish
When you’re ready, go back to the Overview tab and test/preview your contest by clicking the experience URL under Installation.


Click Preview to redirect the URL to an embed on your website.

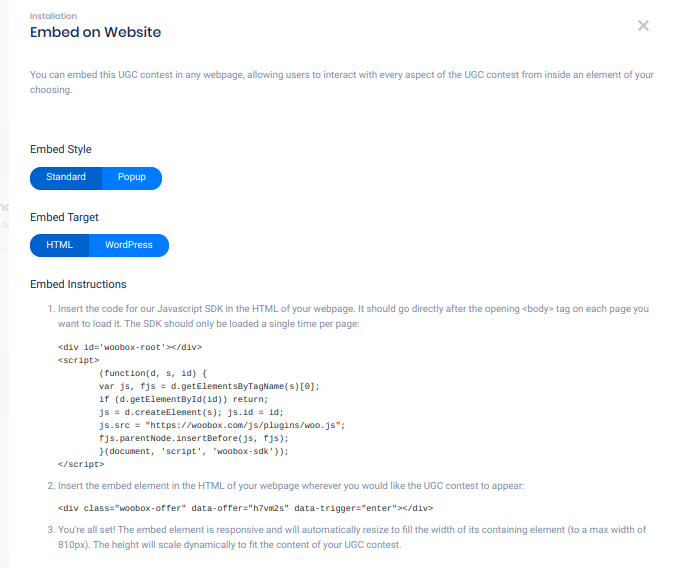
Clicking Embed on Website will open the Embed panel where you can copy the JavaScript embed code or WordPress short-code and adjust optional popup settings.

To turn off Admin-Only mode and publish your experience, click the Publish button in the Status area.

The Poll experience is now eligible for the Free plan! You can publish your campaign for 14 days or up to 100 participants (per calendar month) without upgrading. To continue your campaign and collect more data, simply upgrade to a paid plan.
If you have any questions or issues setting up your experience, don’t hesitate to email us at support@woobox.com!